Boost Your Performance: Master Foam Rolling in Just 10 Minutes a Day
In the world of sports performance, recovery is just as important as training. One of the most effective, affordable, and accessible tools for enhancing recovery and mobility is the foam roller. Despite its growing popularity, many athletes overlook foam rolling due to misconceptions about time, technique, or discomfort. The truth? You can unlock significant performance benefits in just 10 minutes a day with consistent, smart use of a foam roller.
Why Foam Rolling Matters for Athletes
Foam rolling, also known as self-myofascial release, helps break down adhesions in muscle tissue, improve blood flow, and reduce muscle tightness. For athletes, this translates to faster recovery, reduced soreness, improved flexibility, and a lower risk of injury. Studies suggest that regular foam rolling can enhance range of motion without negatively impacting muscle performance—making it ideal for both pre- and post-workout routines.
How to Start in Just 10 Minutes
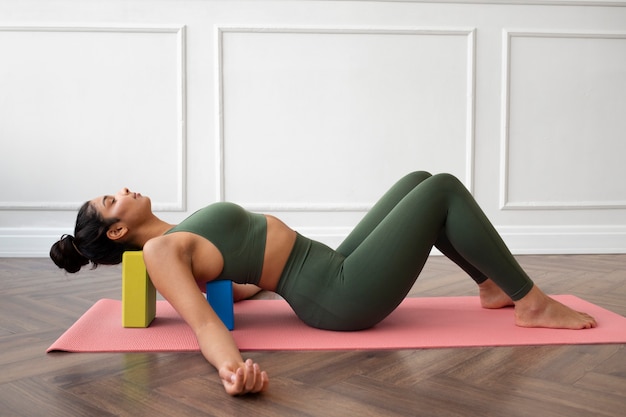
The key to consistency is simplicity. Here’s a beginner-friendly 10-minute foam rolling routine you can do daily, whether you’re warming up or cooling down:
- Calves (2 minutes): Sit with legs extended, place the roller under your calves, and lift your hips off the ground using your hands. Roll slowly from ankle to knee, pausing on any tight spots for 20–30 seconds.
- Hamstrings (2 minutes): Position the roller under your thighs, hands on the floor behind you. Roll from just above the knees to the base of the glutes. Cross one leg over the other to increase pressure if needed.
- Quadriceps (2 minutes): Lie face down with the roller under your thighs. Use your elbows to propel your body forward and back, rolling from hip to knee. Focus on one leg at a time for deeper release.
- Glutes (1.5 minutes): Sit on the roller with one ankle crossed over the opposite knee. Lean into the glute of the crossed leg and roll in small motions. Switch sides.
- Upper Back (1.5 minutes): Lie with the roller under your upper back, hands behind your head. Gently roll from mid-back to just below the shoulders. Avoid rolling the lower back.
- IT Band (1 minute): Lie on your side with the roller under your outer thigh. Roll slowly from just above the knee to below the hip. This area can be sensitive—go slow and breathe deeply.
Stick to this sequence daily, and you’ll start noticing improved mobility and reduced muscle tension within a week.
Track Your Progress for Lasting Results
Consistency is fueled by progress. Use these simple tracking ideas to stay motivated:
- Rolling Journal: Keep a notebook or digital log. Note how each muscle group feels before and after rolling (e.g., tight, tender, loose).
- Range of Motion Check: Once a week, test your flexibility—like touching your toes or doing a deep squat—and record improvements.
- Discomfort Scale: Rate muscle soreness from 1 to 10 daily. Over time, you should see lower numbers on rest days and post-workout.
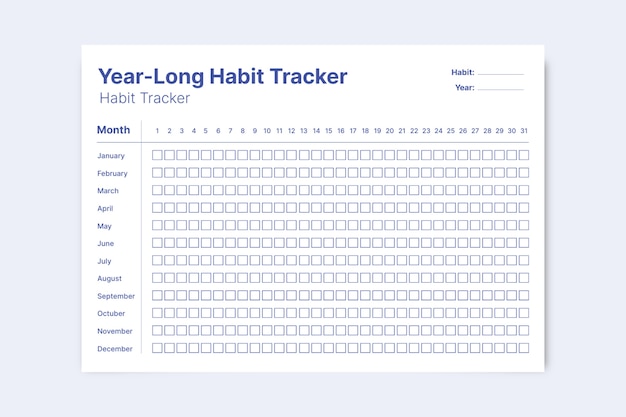
- Habit Tracker: Use a calendar or app to mark off each day you complete your 10-minute session. Visual streaks build motivation.
Stay Motivated with These Cues
Motivation fades—cues keep you going. Try these science-backed strategies:
- Pair with a Habit: Roll right after brushing your teeth or post-workout. Linking it to an existing routine increases adherence.
- Set a Timer: Use a 10-minute countdown. Knowing it’s short and timed makes it feel manageable.
- Focus on the Feeling: Remind yourself how good it feels to release tension. That post-roll looseness is a powerful reward.
- Use Affirmations: Repeat cues like "I’m investing in my recovery" or "My body moves better when I roll."
- Track Weekly Wins: At the end of each week, reflect: Did I roll 5+ times? Did I feel more flexible? Celebrate small wins.
Maximize Results with Smart Tips
- Roll slowly—1 inch per second—for best results.
- Breathe deeply; holding your breath increases tension.
- Avoid rolling directly over joints or bones.
- Hydrate well—fascia responds better when hydrated.
- Combine foam rolling with dynamic stretching pre-workout and static stretching post-workout.
Foam rolling isn’t a magic fix, but when done consistently, it becomes a powerful part of your performance toolkit. In just 10 minutes a day, you’re not only easing soreness—you’re building a body that recovers faster, moves better, and performs stronger.
Make foam rolling a non-negotiable part of your routine. Your future self—on the field, track, or gym—will thank you.